Friday 27 February 2015

It's a gift

Every week I am unbelievably grateful to receive this gift, it is a gift that my work colleagues envy, a gift that can not be bought... it is the gift of a day off. 


But what is it about a day off that makes it so incredibly sacred, when in fact my day off is probably my busiest day of the week - cleaning,running errands and hopefully a bit of mabel&may time, if I'm lucky. 

For me its a day when I'm in charge. I can selfishly decide, where to go, who to see and what to do. So whether I decide to spend  hours cleaning the oven (very rare) or a day at the spa (still rare but probably more frequent than the above) to be in total control of my day is a great motivation.


For me this day is also about preparation for Friday night and the weekend -  this is family time.... this is precious x


So on the subject of gifts, here is a piece I have been working on for a gorgeous family ...and yes its a gift .


Have a great weekend 


Saturday 21 February 2015

A visit from the Tooth Fairy


               For my first crafty tutorial I wanted a little project for everyone to have a go at!


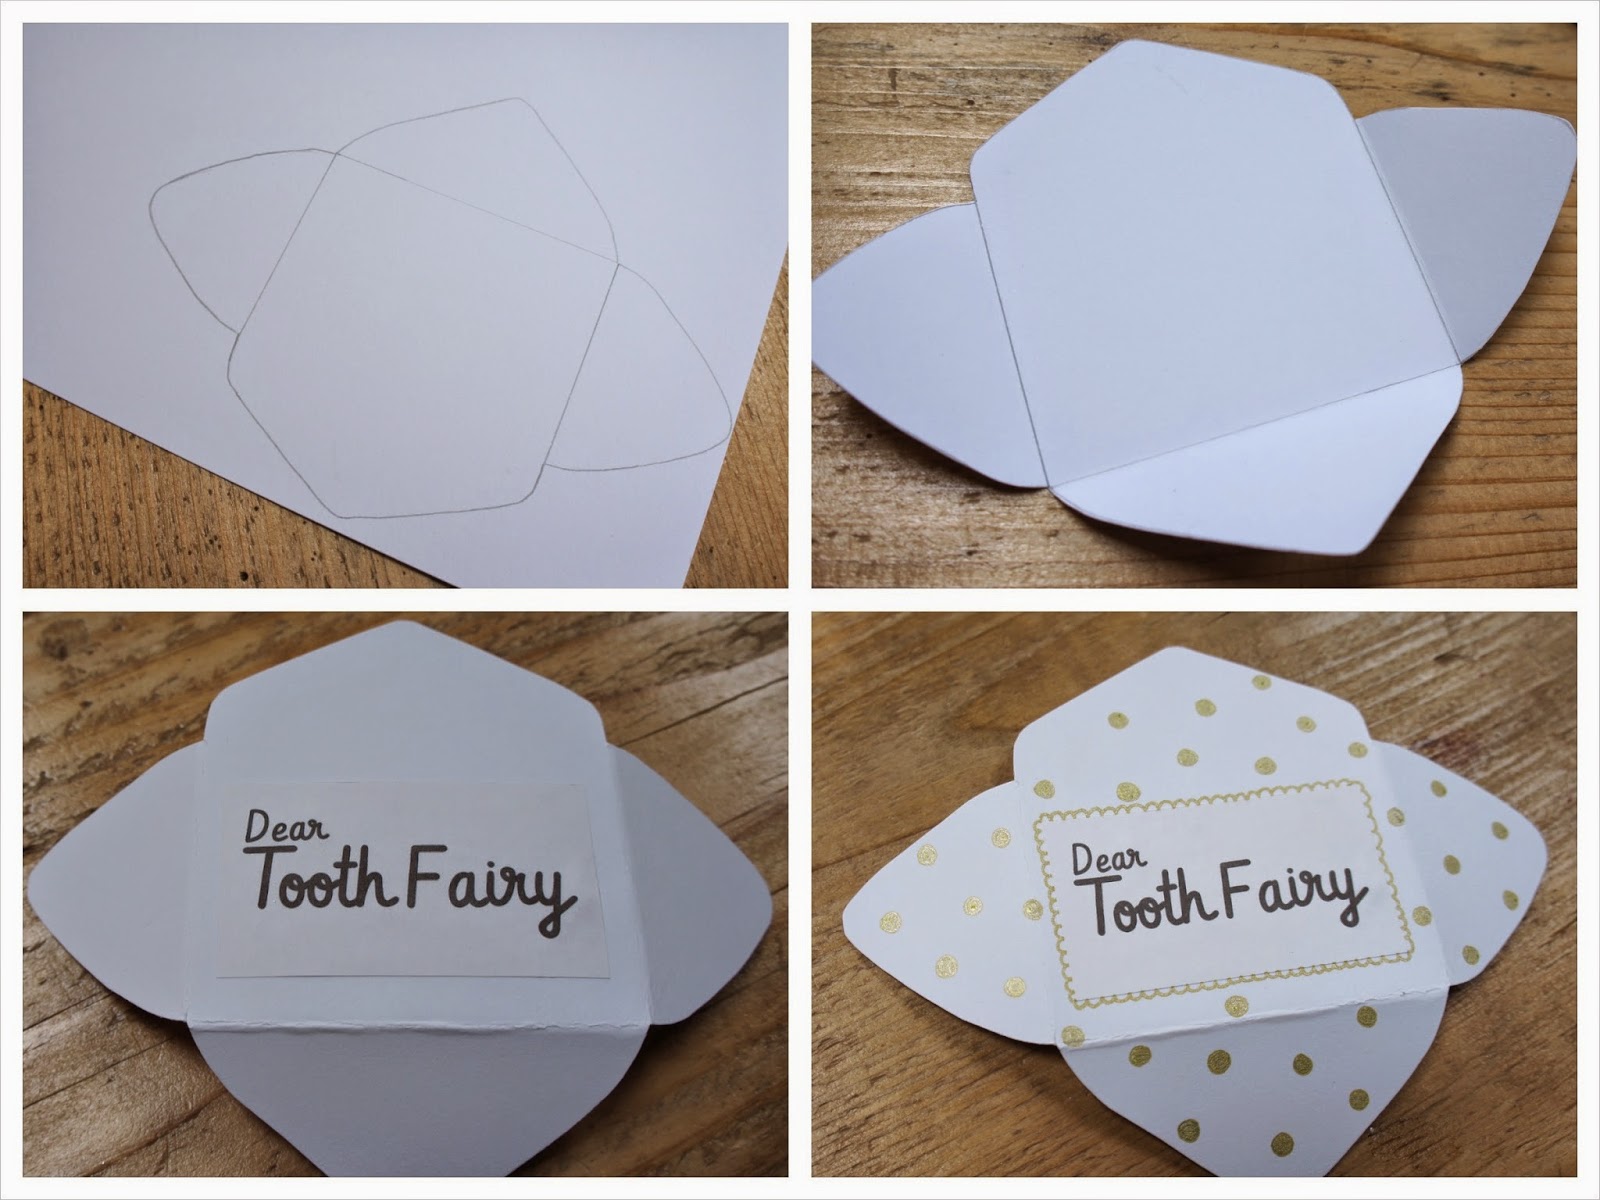
You will need: A printer, to print out the template.
                        Card stock or paper.
                        Glue (I use a glue gun, I'm very impatient!)
                        Scissors.
                        Pens if you wish to decorate

First you will need to download this template to print.


You will need to cut out the template pieces and draw around them on to your chosen card or paper, then cut out.

I then scored my folding lines and glued on the address panel.
As I used plain stock card, I decided to decorate using a gold metallic pen, drawing on sparkly gold dots to match my gold spandangly fairy wings.


At this point you can either seal the back of your envelope(the bottom and side panels) and  glue the wings on the back or if you are able to use a craft knife, score along each side of the envelope so the wings can be pushed in,glued and therefore concealed. 


Voila !!! So this is the basic design, I would love to see your own versions with different papers and personalisation. 
If you would like to share please use the #mabelandmaymakes on social media x


The inspiration behind this tutorial came from my original designs for Fabric Tooth Fairy envelopes.


Hello and Welcome

For those of you who are already well acquainted with Mabel&May, please bear with, while I introduce myself to the world of blogging.

 I started Mabel&May not only to channel my thirst for creativity but to indulge in something that gives me enormous pleasure. Over the years I have been able to successfully promote and sell my wares using social media platforms and have been very grateful to a large following of loyal and supportive customers.

 It is with these people in mind, and the desire to connect with new like minded folk, that I decided to enrol myself in to the world of blogging. As a blogger I will endeavour to post once a week with a broad spectrum of topics and to once a month include a crafty tutorial. 

 If you are new to Mabel&May and deciding whether to stick around, here are a few little nuggets of my work.


 Cotton clouds - I have recently altered my original design to be able to indulge in my obsession with copper(added copper wire LEDs). I have one of these hanging over my desk, though I think its most popular destination has been Nursery's and children's bedrooms -  Super cute !
                            
On my to-do list is to make a huge pile of cloud cushions in pretty pastels.


You will probably see a common theme in lots of my makes....a love for hares and bunnies !


Thanks for popping by, I would love to hear what kind of tutorials you would like to see.